FF1 Part 1 - Concept and Construction
I recently finished frame number 28. This one was designated as FF1. FF for "Fast Fold".
Its mission statement was:
A travel bike for day touring that can convenientily pack to a convenient size.
Let's go deeper into the two requirements.
A Travel Bike
This bike would be for vacations centered around travel by bicycle. This would usually be called "credit card touring". The bike would not need to be able to carry four panniers for self-sufficient global touring. It also does not need to handle extreme distances or elevations. It does not need to handle bikepacking terrain.
Since traveling might result in the bike being damaged en route, or possible stolen, it can't be too precious. I don't want to invest too much time or money in fancy materials and complex machining. If the bike can mostly look "like a bike" that's even better.
Inspirations for this mode of travel with more normal bikes were:
- Pal Pete's travels with his Bridgestone and his "throw it in a bag" attitude seemed to match my goals.
- Ronnie's travel Klein follows a similar strategy, using a 90s MTB as a light and slightly more compact platform.
Convenient Packing
The bike should pack to a convenient size that would be welcome on most trains or subways or the trunk of a taxi. It does not need to get to the official airline dimensions. Nor does it need to be "folding bike" small like a Brompton.
Folding it should be easy and quick and not require lots of tools. It shouldn't result in a "yard sale" of pieces and parts.
Other Factors
I would like to use up some "project parts" I have sitting around as well as frame tubing I have in stock. This sort of falls under the "not precious" rule.
Initial Constraints
Given this mission statement I started focusing on the design.
Wheel Size
On the small end, I considered 24" as there are a couple interesting tires for junior mountain bikes and BMX cruisers. Alienation makes 24" tubeless rims and some tires that have all-road looking treads. On a recumbent trike I saw the Maxxis Sniper which looks like it could also be the basis of something. But in the end the wheels would have likely been smaller than the packed frame size so there were no benefits.
26" was a better size, but the tire selection these days isn't that great. Having had a 26" randonneuring frame built around the size I considered it big enough, but I still wasn't that excited about it.
I did have a pair of 650b rims in my stash, and though the tire selection is slowing getting smaller, there are more nice tubeless options. With a 47mm gravel tire I'd have enough traction and rollover to go most places and stay in a good mood. Finding some 650b x 47 Vittoria Terreno Drys on closeout for $30 each was another plus.
700c would be the most proportioned for my frame size, but I felt that I could step down to 650b just to get things a little more compact.
Packing Mechanism.
I divided the options into two camps: folders that use hinges so the bike is always in one piece, and breakaways where the frame separates into two pieces.
What about Rinko?
Japanese "Rinko" packing where the bike is packed smaller by removing the fork seemed like an option, but it probably works better when the frame is smaller relative the wheels and fork. It probably makes more sense when you want to keep a fender on the front wheel. I did think about it, but it didn't offer the design challenge.
Breakaways.
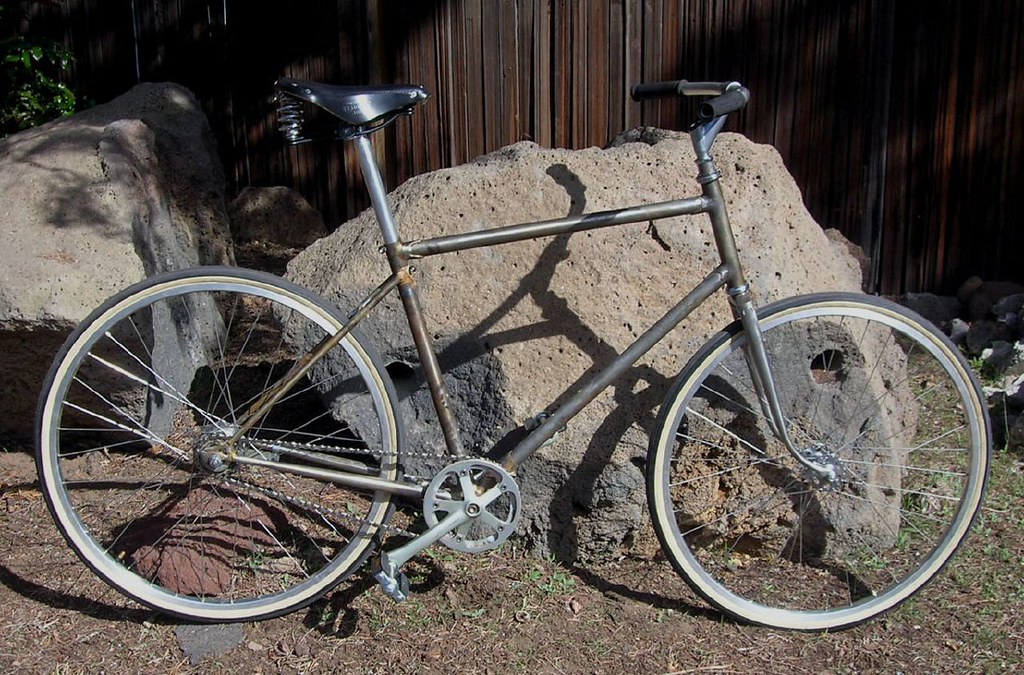
Back in 2008 I built frame number 6 a.k.a. the Stage Bike (Stage as in stAHzh, a sort of internship for chefs). The concept was an elegant city bike that could pack to airline regulations. It used a sleeve joint at the down tube and a Ritchey style double seat post clamp to break apart. It was built around 26 x 1 3/8 rims and a two-speed kickback hub. It was supposed to get a big canvas front basket that would collapse flat, but the bike just never clicked so I sold the wheels and threw the frame in the attic.
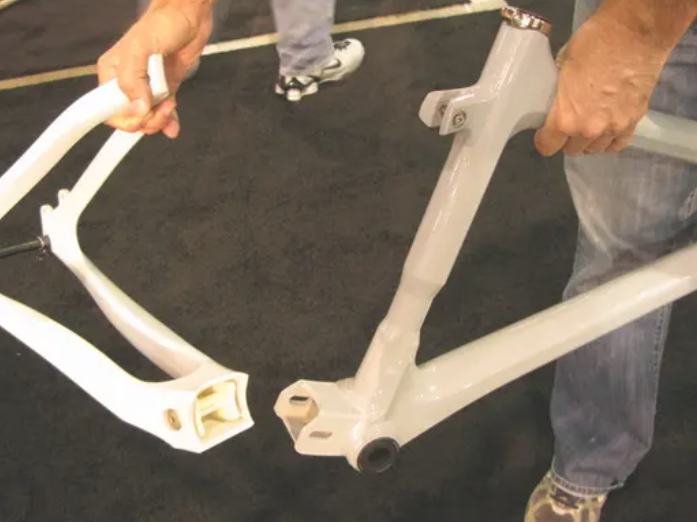
The commercial options are mostly only sold to professional builders. They also tend to be intricately machined and have eyewatering prices. Ritchey does sell their Breakaway clamp through retail channels so I considered reverse engineering their down tube flanges but I decided to look at other options.
A simpler demountable design like a Rene Herse or the Stage frame was an option. But then I end up with the frame in two pieces and keeping things together had more appeal. So I turned my attention to hinging designs.
Hingers
Bike Friday recently released their "Gravel" folding bike and I admired some of the tricks they used to get it to quickly unfold into a bike.
The Ibis T29 (which originally had a different name) sort of hinges. Well, it has a pivot that can be used to adjust the chain tension when in single speed mode. It doesn't fold up so really it's a breakaway that packs as two pieces. But from a design standpoint it had me thinking that a hinge could fold and also be an extremely simple breakaway joint compared to the machined couplers.
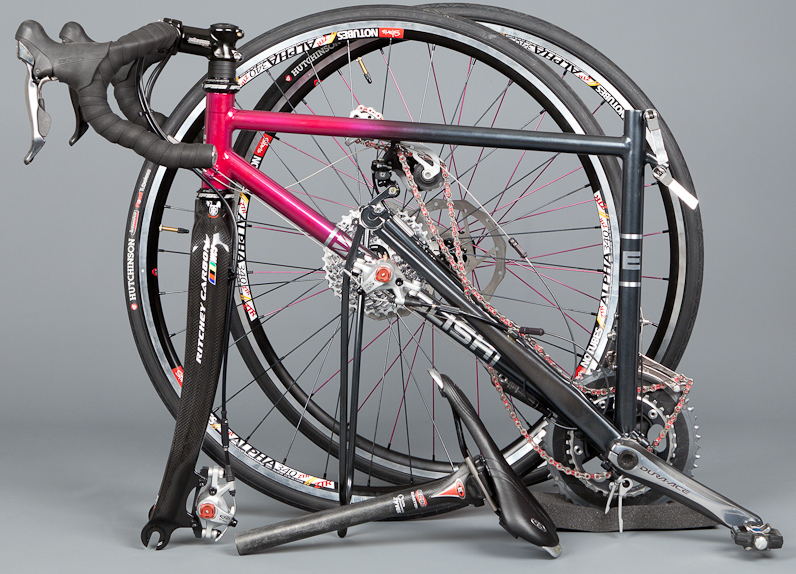
Rob English has built several folders that have pivoting chainstays that fold the bike up small. These orbit around the bottom bracket shell and I sketched out several ways to do something similar but none of them made it past the CAD stage.
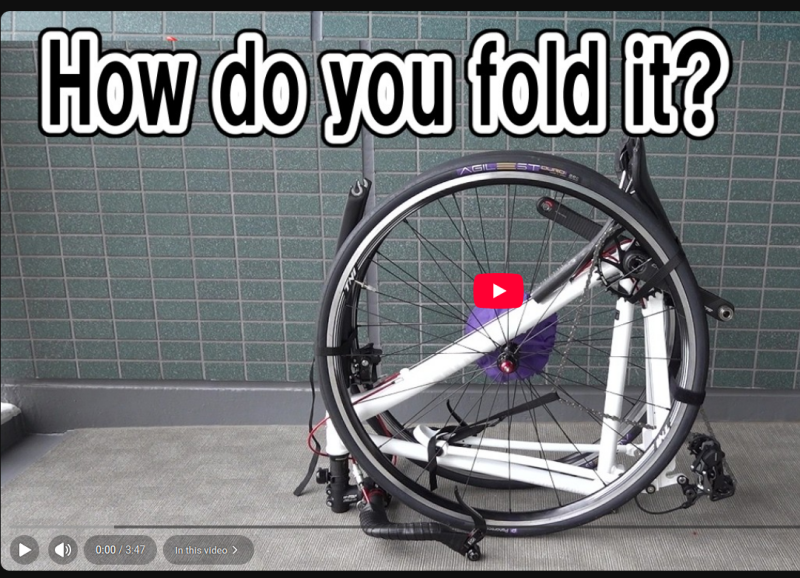
The Musasashi folder came up in my Youtube suggestions and it's similar to the English designs. The rear brake location was very unappealing but overall it's in the right universe.
Also taking up room in my brain were the Mone Hijole and Starling Beady Little Eye, single-speed full suspension bikes that pivot concentric to the bottom bracket. While not explicitly folding bikes, the shock can be unbolted and the swingarm pivoted into the front triangle. Considered from a folding standpoint only, I liked how compact and simple the design was. They're similar to the fold on the English but pivot on real bearings.
One of my favorite bikes of all time, the Hunter Cycle Truck uses a hinge-like bolted joint (but is a breakaway design) that I probably re-examine at least once a year.
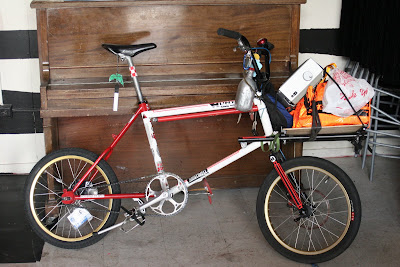
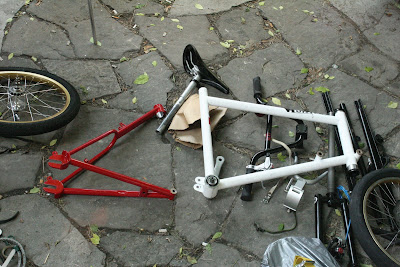
Base frame design
The base fit numbers were taken from SC3. When I was messing with different bars I had ridden it with Jones Bars and kept track of the stem length that would make a basis for a swept-back bar build. So I at least knew where the head tube needed to be and where to aim the seat angle. As starting points, the numbers were a 72 seat angle and a stack and reach of 610/385. I kept the bottom bracket drop the same. While the wheels were smaller, since I run 155 mm cranks the pedal height is about the same as you'd get on a road or touring frame.
We need a fork
I try to avoid building forks if I can buy what I want. I didn't want disc brakes so that cut out a lot of options. The selection of 650b forks were pretty limited with no real budget options. 26" mountain bike forks are easy to find and should clear the tire, so it seemed like the easiest thing to do would be to get one and move the cantilever brake bosses up. Or what if I find a centerpull brake that fits and even take off the bosses? That's even easier, and those brakes, while not amazing, would work well enough. But I really would prefer to have a V-brake given the choice.
There was one more option - keep the bosses at 26" but use a V-brake with more pad range. I'd lose some brake power (but gain pad clearance) and not have do to anything to the fork. By using a stock fork I could easily replace it in case it gets crunched. I'd also have the option to use a 26" wheel in an emergency. Seemed like a win.
I looked at the replacement fork options and that gave me choices of either 1" threaded or 1 1/8" in threadless or threaded. I could have grabbed something from the co-op but usually the steerer tubes are too short. From the retail options the one that had the look I preferred was the cheapest chromed hi-tensile steel replacement fork from eBay. At $50 it was anything from precious.
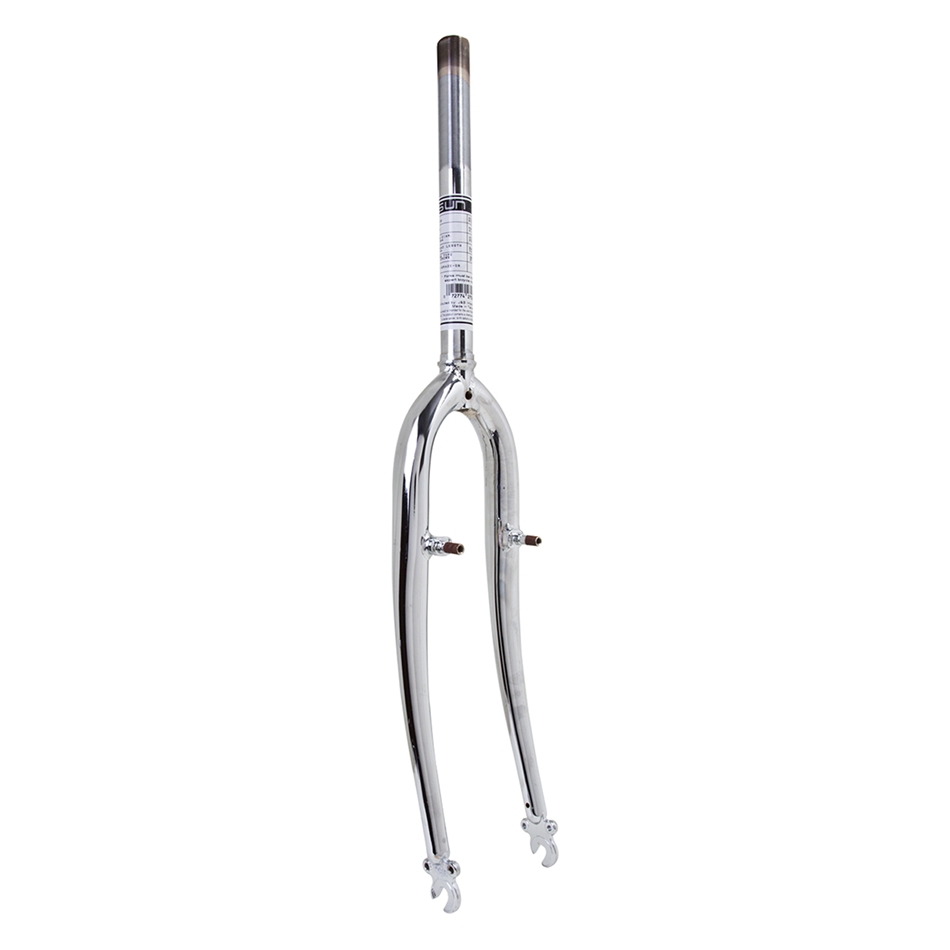
There is also a version of this cheapo fork that doesn't even have cantilever bosses. I later measured the required brake reach to be about 74mm which would put it at the limit of the nicer Tektro R559. They might just work, or need the slot filed a millimeter or two.
A threadless fork would make rinko fork removal strategies easier but the quill stem has its advantages too for disassembly so I decided going the threaded route would an acceptable path.
With the fork settled that finished the front half of the bike design. The fork is a very non-metric 52mm of offset, so with 650 x 47 tires and a 72 head angle you get a nice 57mm of trail. Next was to start thinking about the back and how it would fold.
Can I get a fold?
The earliest design and sketches revolved around concentric to BB designs. I saw some promise in something that would work similar to the Beady Little Eye but on bushings instead of bearings. The system didn't need to be smooth for suspension action, but getting the tolerancing right to keep the rear triangle not feel loose but still easy to fold seemed like too much of a faff. Something that clamped around the bottom bracket shell similar to the English designs seemed better, but also cramped unless I went with a wider press fit shell, and that felt like it was getting away from the simple and boring parts requirement.
Since suspension pivot concepts were floating around my brain, I thought about the URT rear suspension design I knew from my past employment at VooDoo Cycles. What if you hinged the back triangle and the seat tube into the front triangle? You could split the seat tube Ritchey style to let most of the rear triangle pivot. This seemed like it had potential.
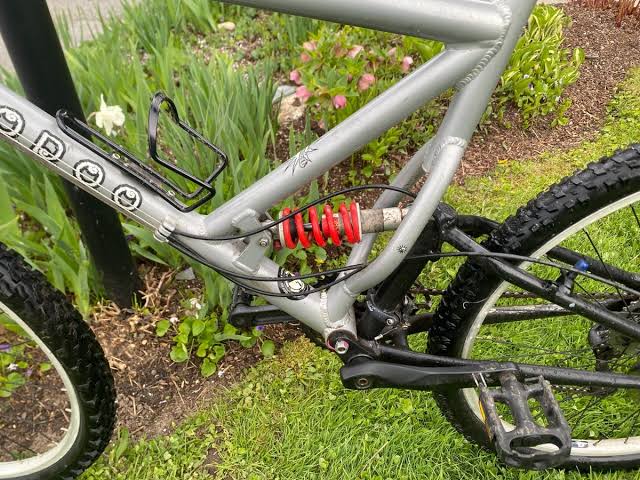
The first sketches had a similar hinge placement and size to the VooDoo URT. When I simulated the fold the seat and down tubes came close together, and I spotted a disadvantage to the design - you'd have to remove the water bottle cages. But then I remembered there's some bottle cages that have a split design where there's two halves that hold the bottle with a gap between them. Some quick image searching confirmed that this could work. Later I'd even find a pair of Bontrager split cages at the co-op that I could use. The cages would still need some room between the tubes for their bolts and base, so I adjusted the hinge plates longer.
As I simulated the fold in CAD, I noticed that circle defining the rear axle would swing really close to the circle I drew representing the seatpost clamp boss. If they overlapped - what would that do? Of course! Have a dummy axle for the rear triangle mount through the boss! This would lock the bike closed and support the top tube adding extra structural integrity for travel. But for short journeys in a bag you could skip it and just strap the pieces in a closed position. I adjusted the chainstay and seat tube lengths to get them lined up nad looking right. The final chainstay length was 467.
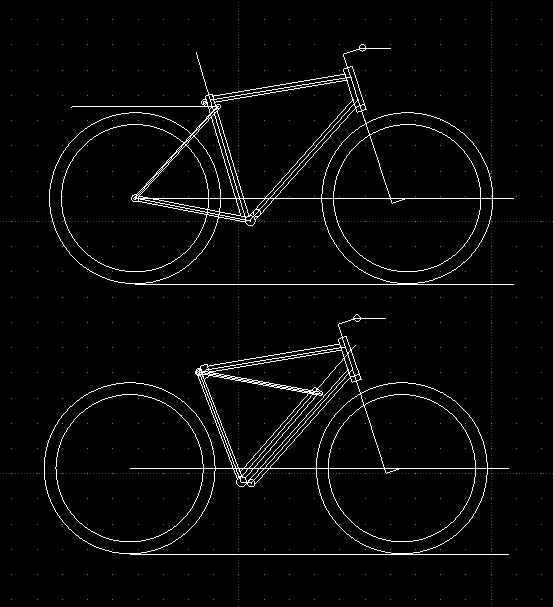
The final frame specs aren't even that weird, other than the low bottom bracket. If it had a level top tube it would be a 60cm frame with a 58 top tube. The 72 degree angles and 460ish stays would not be out of place on a touring bike. It's within a thumb's width of a 57cm Rivendell Roadini, if you want something to compare it to.
The hinge
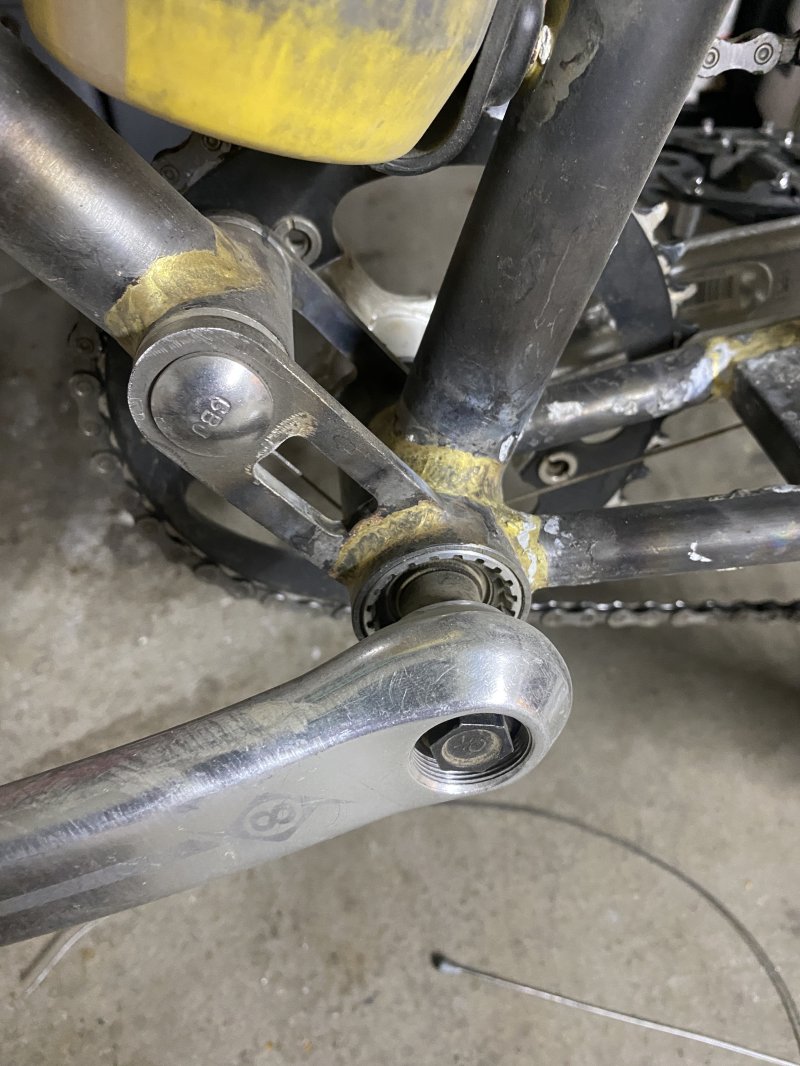
Since these parts were inspired by a URT pivot that I have some spare parts for, I considered copying it and using sealed ball bearings, but I don't need a low friction design so I wanted to keep it simpler. I wanted the pivot to be clamped from one side only, and a cheap and easy way to accomplish that was with a carriage bolt that could be pulled out from the non-drive side. A 3/8 thread locknut also uses a 9/16" nut, which is the same as 14mm.
The center of the hinge would just use bushings, so I looked around McMaster Carr for some off the shelf possibilities, hoping to find some kind of flanged Oilite bushing to drop in. Nothing was quite the right dimensions. I then checked the pricing for brass rod but yikes! Too expensive. The design really doesn't need any concept of lubricity so I used some aluminum stock I had. Good enough.
I sent two DXFs for the hinge parts - one with a 3/8 round hole and one with a square hole for the carriage bolt head - to SendCutSend and in about a week had four sets ready to go.
Tubing
I had standard frame size 1" and 1 1/8" tubing in 0.035" straight gauge aircraft cromoly already. The extra weight of unbutted tubing wasn't an issue and the standard size would get a stiffness boost, as well as some extra toughness. I also had 1/2" and 5/8" for stays so that would work fine too.
I hate bending tubing, but with the long chainstays I could run them straight. The seatstays could run to a "fastfront" seat clamp boss eliminating bends there and giving me a simple parallel miter on each end of the stay.
For the seatpost end of the seat tube I'd need to do something to increase the wall thickness to handle the distortion from the top tube joint. Sleeving the extended span across two seat post clamps seemed like a lot. But I had some 25.4 seatposts from using the Cannondale SAVE posts and some 0.065 1 1/8" tubing so I turned some integrated collars from that. The seat clamp bosses themselves were made from 1/2" 0.065 tubing for the top boss and the 5/8 tubing from the chainstays for the bottom.
To make the miters dead easy and give a nice flat spot for fenders to bolt to, I made the seatstay bridge from 1/2" square tubing. The chainstay bridge got a bigger piece of scrap 1/2" x 1" rectangular tubing and a water bottle boss for the fender bolt.
A 73mm BB shell to snuck the stays out a little more (again, anything to avoid bends). The dropouts were some investment-cast hooded style with a spigot for a 16mm tapered chainstay. That matched up perfectly to the 5/8 straight tubing.
I left off the bosses for first test ride since I wanted to see how it would fold. I also couldn't decide on a shifter boss or cable stop, as well as if I wanted to stick to one or two so I could run a front derailleur or not.
Bottle nesting
Once I had the spine of the bike brazed up I manually confirmed the bottle cage locations. I discovered that the Bontrager cages had some holes that allowed them to overlap slightly which gave me better bottle positioning. I also discovered that the gap between the tubes when folded was not quite enough to fit the bottom stop of the cages, so I had to trim that part of the cage shorter to clear. I might be locked in to these cages by overlapping them, but I think I'll be fine. I'll grab an extra pair off of eBay. If I build another maybe I'll look at some other bottle cage and try to be more universal.
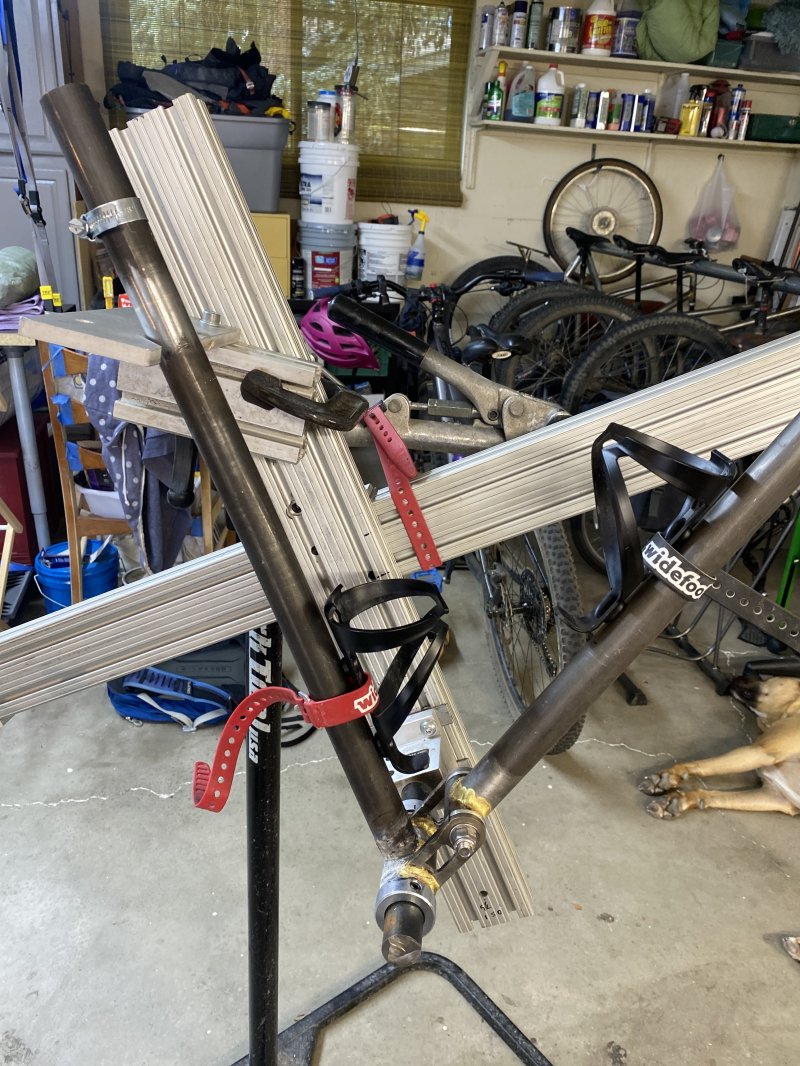
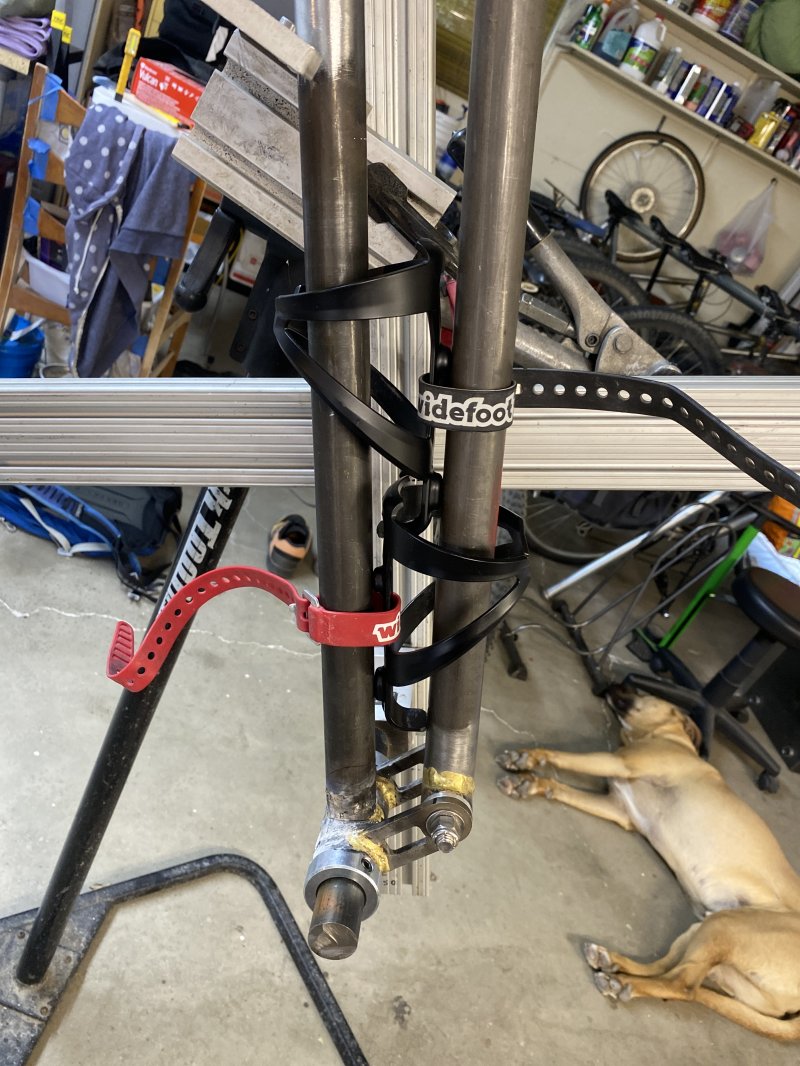
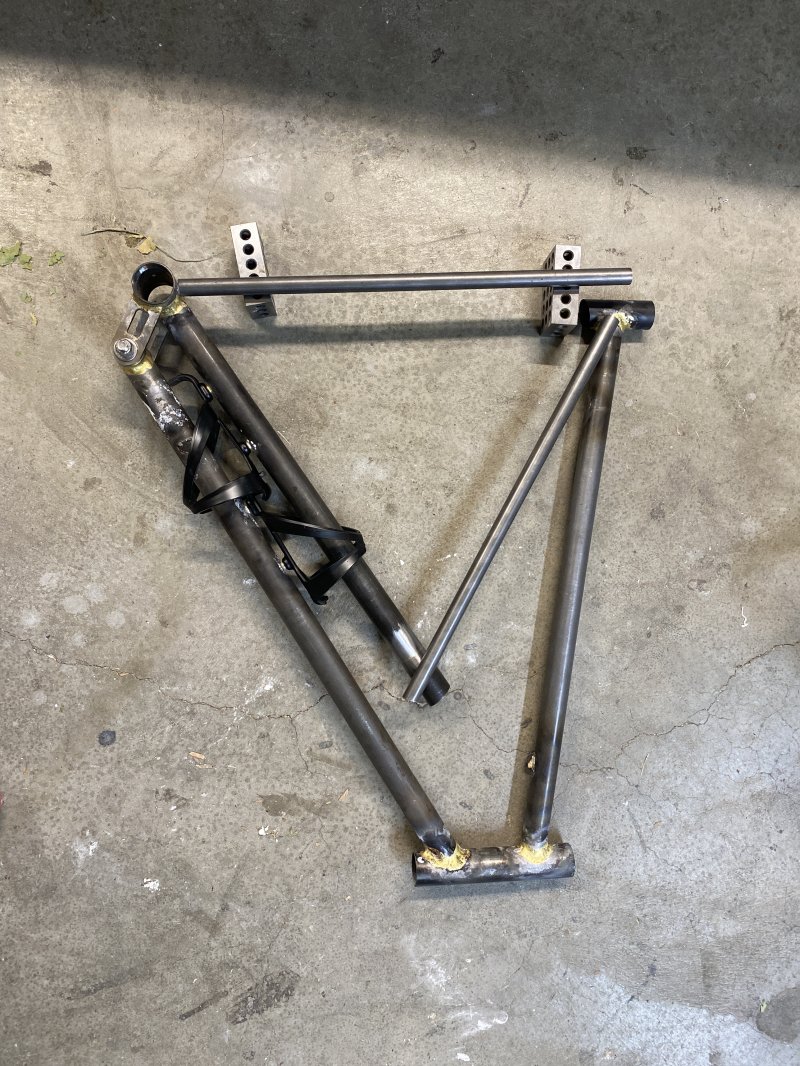
I was glad I could fit up the bottles with the frame incopmlete but still in a foldable state. I could then take the two halve apart and drill the holes for the bosses easily.
Pause for direction.
I still had some questions about the direction of the bike build, so once the frame was complete enough to take a fork and wheels and some parts, I did some quick mockups.
Flat or negative stems looked wrong. The bike definitely wanted a positive stem. It looked OK with both drops or swept-back bars.
I tried a retro triple crank and front derailleur and it felt off. I thought maybe the smaller cassette you can use with a triple would help packing. Something about bigger modern black 1x cranks seemed to match up better.
One thing I've learned over the years is that bikes want to be a certain way and it often doesn't work to make them into something they don't want to be. This can be rough if you try to make too many decisions too soon. Discovering this mismatch after putting a ton of work up front can be quite depressing. So I was glad to feel the bike out to clarify where it was going. This did tell me that only needed one cable guide or boss for the front derailleur. And with a down tube shifter still in the mix I'd need to run a bottom bracket guide and a cable stop on the stay. To fold the frame I'd also need split stops on the top of the top tube so I could unhook the housing from the back half of the frame.
Last major step to get it rideable was to add the top seat post clamp boss, using a dummy axle as tooling.
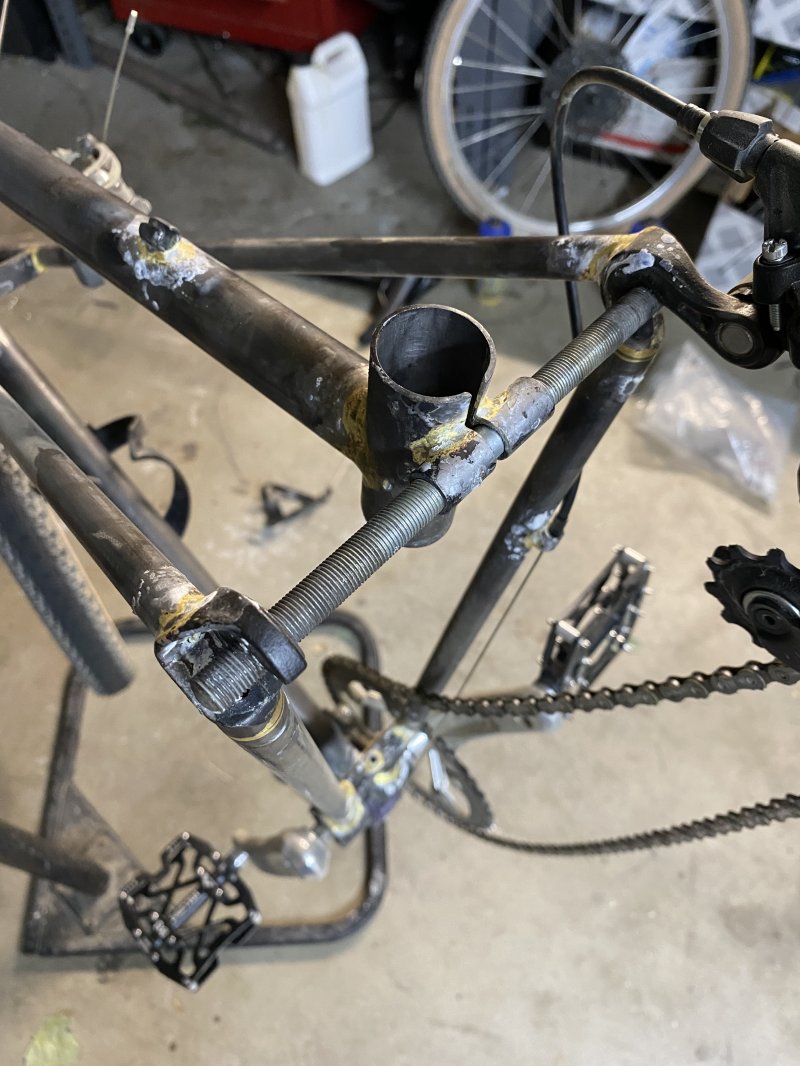
The bike was done enough to build it up and ride it with hose-clamped rear derailleur stop and no rear brake. The first test ride was enough to confirm the cable stop locations and soon the frame was done with brake and cable bosses.
Continued in Part 2 - the parts build.